Okay, so I decided to tackle a gluten-free carrot cake today, and I really wanted to throw some pineapple in there for extra moisture and a bit of tang. Let me walk you through how it went down in my kitchen.
Getting Started
First thing first, I pulled out all my ingredients. It’s always easier when everything is right there, you know? For the flour, I used one of those gluten-free all-purpose blends you can buy. I find they work pretty well most of the time. Then, of course, the stars of the show: lots of carrots, which I grated myself – took a bit of elbow grease, but worth it – and a can of crushed pineapple. Important step: I made sure to drain that pineapple really well. Nobody wants a soggy cake bottom.
Other stuff I gathered:
- Sugar (I used a mix of white and brown)
- Eggs
- Oil (vegetable oil works fine)
- Vanilla extract
- Spices – cinnamon, nutmeg, maybe a pinch of ginger
- Baking soda and baking powder (for lift!)
- A bit of salt
- And some chopped walnuts, because I like the crunch.
Mixing it All Up
Alright, mixing time. I started by whisking together the dry ingredients in a big bowl – the gluten-free flour blend, sugars, baking soda, baking powder, salt, and all those lovely spices. Gave it a good mix to make sure everything was evenly distributed.
In another bowl, I whisked the wet ingredients – the eggs, oil, and vanilla extract. Pretty straightforward stuff. Then, I poured the wet mixture into the dry ingredients. I stirred it all together just until it was combined. You really don’t want to overmix gluten-free batter, I find it can get tough sometimes.
Once the batter looked mostly mixed, I folded in the grated carrots, the well-drained pineapple, and the chopped walnuts. Folding means using a spatula and gently turning the batter over itself until the carrots and stuff are just incorporated. Again, gentle is key.

Baking Time
I had already greased and floured two round cake pans (using gluten-free flour for dusting, obviously). I divided the batter evenly between the pans and smoothed the tops a little. Into the preheated oven they went! I set my oven to around 350°F (that’s about 175°C).
The house started smelling amazing pretty quickly. That warm, spicy, carrot cake smell is just the best. I let them bake for a good 30-35 minutes. The best way to check if they’re done is the toothpick test – stick one in the center, and if it comes out clean, they’re ready. Mine needed closer to 35 minutes.
Cooling and Frosting
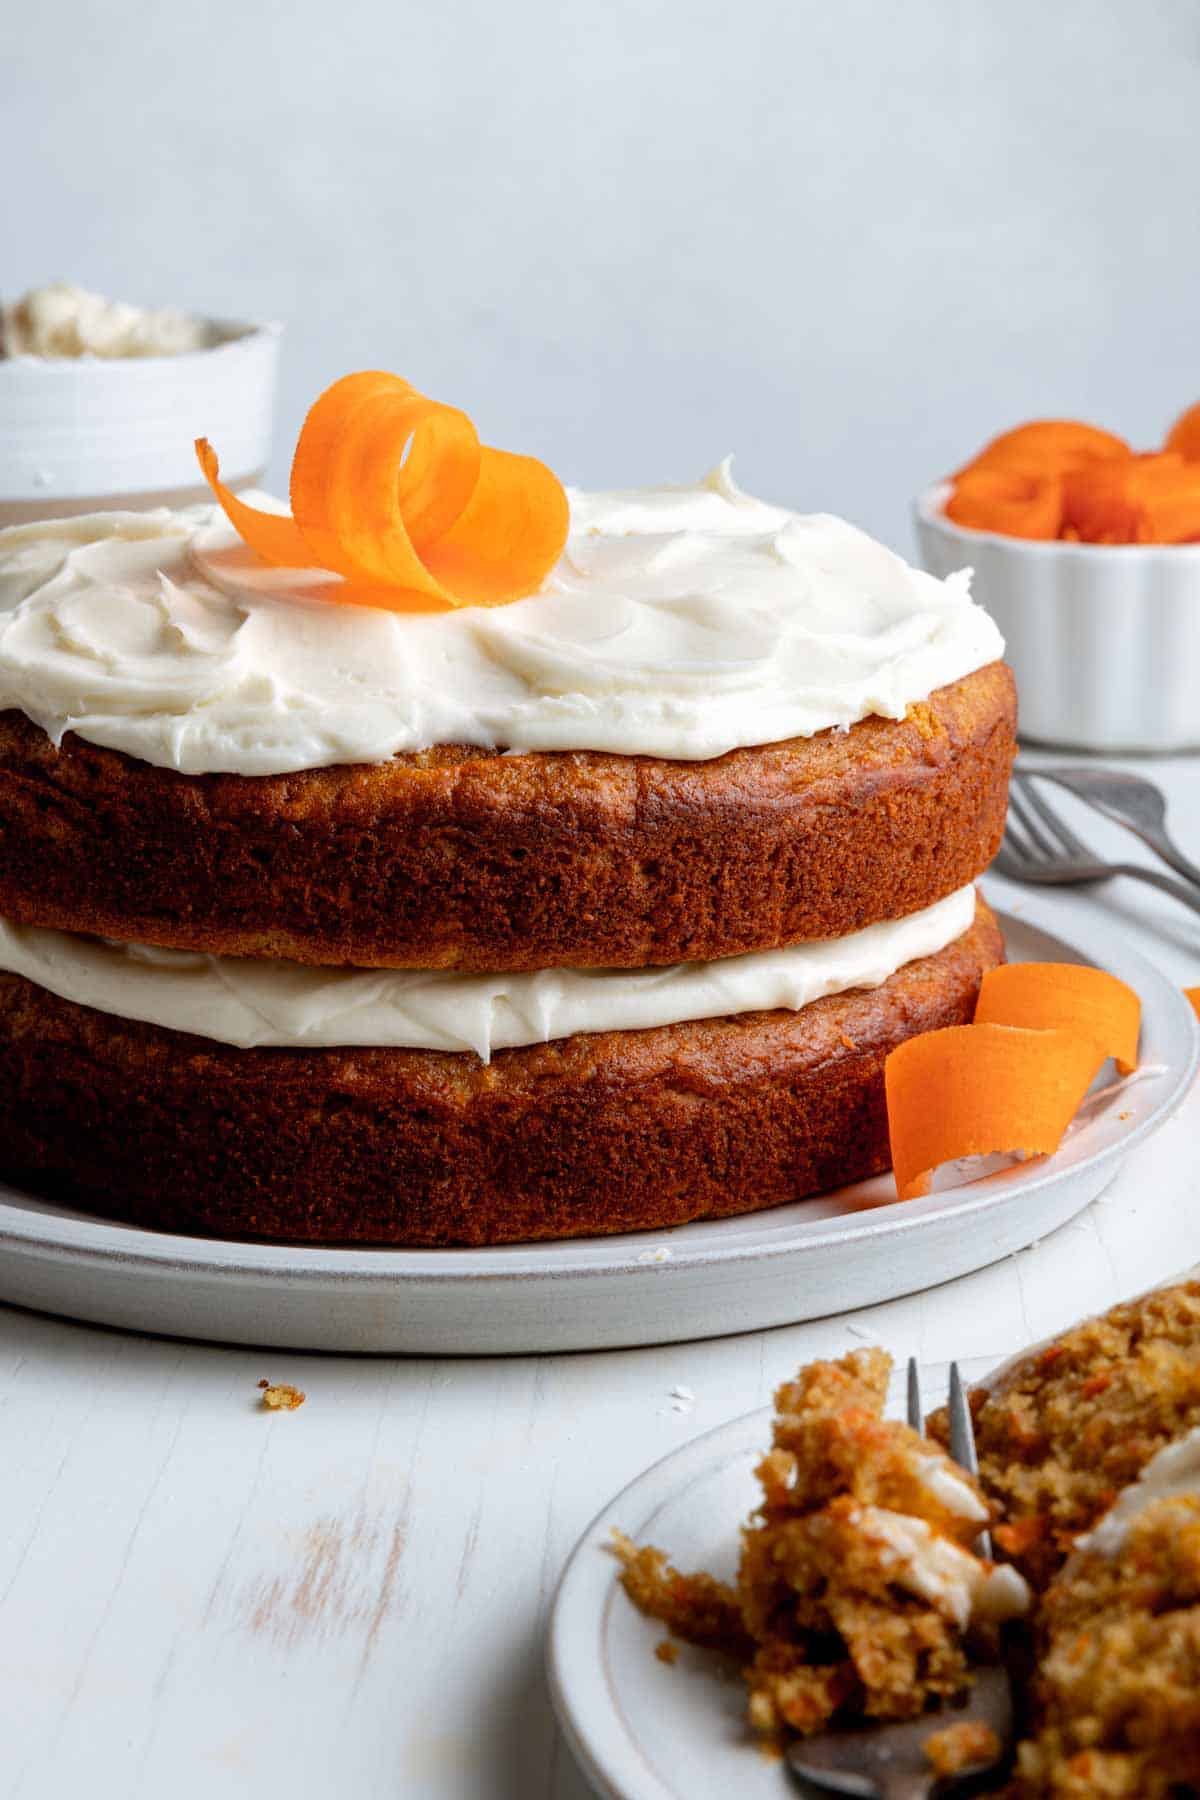
This part requires patience! I let the cakes cool in their pans for about 10-15 minutes before carefully turning them out onto a wire rack. Seriously important: Let them cool completely. Like, totally. If you try to frost a warm cake, you’ll just have a melty mess. It took a couple of hours.
While they cooled, I whipped up a simple cream cheese frosting. Just cream cheese, butter, powdered sugar, and a splash of vanilla. Beat it until it’s smooth and fluffy. Standard stuff, but always delicious.
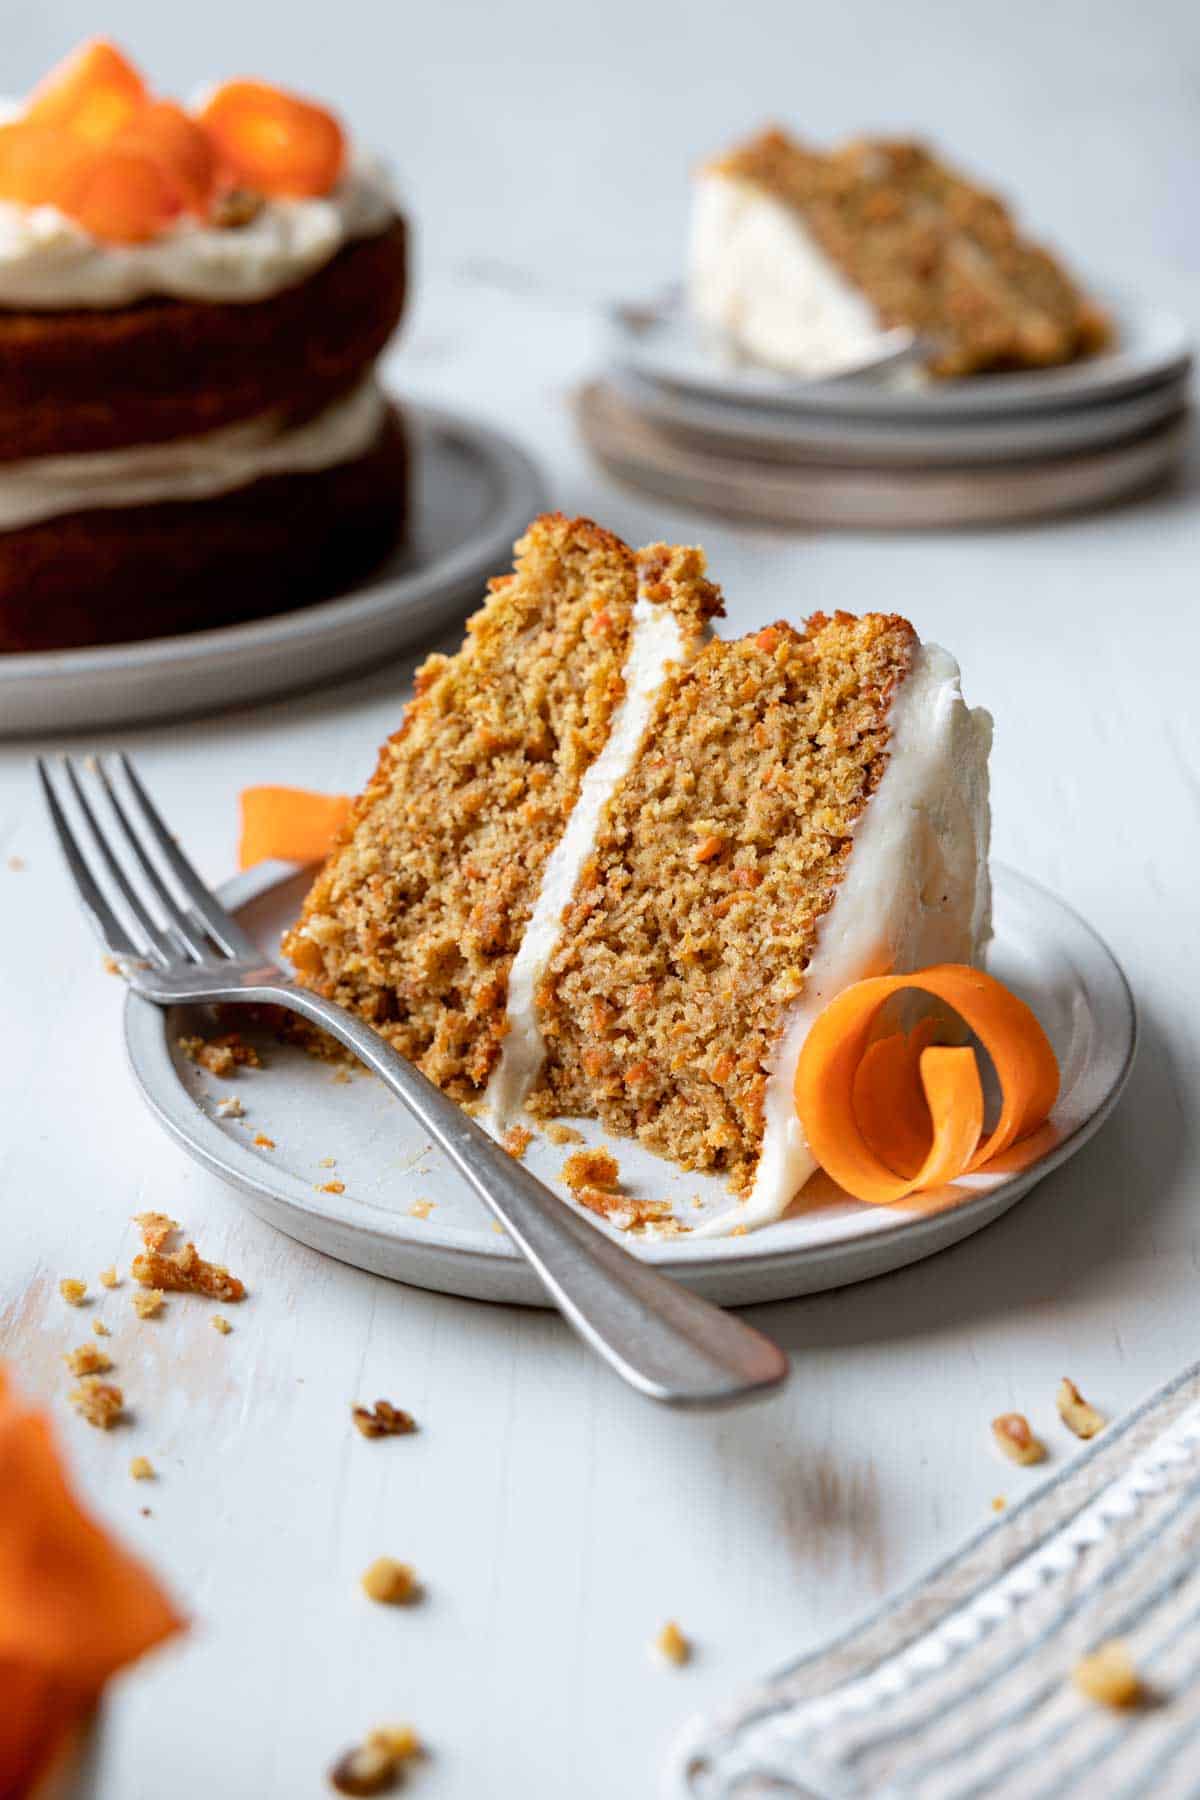
Once the cakes were fully cool, I put the first layer on a plate, spread a generous amount of frosting on top, placed the second layer over it, and then frosted the top and sides. I’m not a fancy cake decorator, so I just went for a rustic, swirly look with the spatula.
The Result
And there it was! My gluten-free carrot cake with pineapple. Cutting into it, the texture looked pretty good – moist, thanks to the carrots and pineapple. The taste? It was great! Sweet, spicy, with that nice tang from the pineapple and the cream cheese frosting cutting through the sweetness. The walnuts added a good crunch. Being gluten-free didn’t hurt it one bit, it was still tender and delicious. Definitely a successful baking session today!