Okay, so today I’m gonna share some super easy braid styles I’ve been messing around with. Honestly, I’m no hair stylist, but I get bored easily and like to try new things. Plus, braids are a great way to keep my hair out of my face.
First up, the classic two-strand braid. I started by just parting my hair down the middle. Nothing fancy, just eyeballed it. Then, I grabbed one section and split it into two. After that, it’s just twisting one strand over the other, all the way down. I secured it with a simple hair tie, and did the same thing on the other side. Boom! Done. Took maybe five minutes, tops.
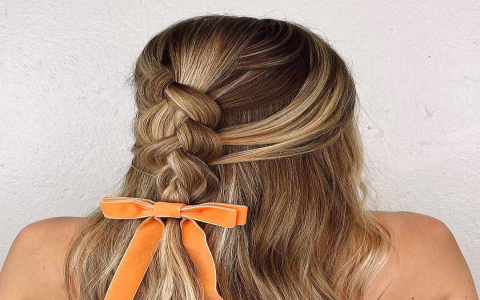
Next, I tried a fishtail braid. This one looked intimidating at first, but it’s surprisingly easy once you get the hang of it. I pulled my hair back into a low ponytail and divided it into two sections. Then, I took a small piece from the outside of one section and crossed it over to the inside of the other section. Repeated that on the other side, keeping everything tight. It feels a bit fiddly at first, but you quickly get into a rhythm. When I reached the end, I secured it with another hair tie and gently pulled the braid apart a little to make it look fuller. I gotta say, it looked way more complicated than it actually was!
Then I tried something a little different – a half-up crown braid. Okay, so this one required a little more effort. I started by taking two sections of hair from the front of my head, near my temples. I braided each section back, like a regular three-strand braid. Once I reached the end of each braid, I pinned them at the back of my head, crossing them over each other to create a “crown” effect. It was a bit tricky to get the placement right, and I had to use a few bobby pins to secure everything, but the end result was pretty cute. Felt a bit like a woodland fairy, haha!
I even tried a knotless braid inspired look. I’m not trying to do the real thing, as that takes hours. Instead, I did a regular braid close to the scalp for a few sections, then just started adding hair into the braid as I went down. Sort of mimicking the “feed-in” technique. It wasn’t perfect, but it gave a similar vibe without all the time commitment. This is what I did:
- Started with a small section near my forehead.
- Braided a few stitches normally.
- Started adding small pieces of hair into each strand as I braided down.
- Kept the tension even.
- Secured it at the end.
Finally, for a super quick and easy option, I did a bubble braid. This isn’t really a braid, but it looks cool and takes like, two seconds. I just pulled my hair back into a ponytail and secured it with a hair tie. Then, every few inches down the ponytail, I added another hair tie and gently pulled the hair out between each tie to create a “bubble” effect. It’s so simple, but adds a little something extra to a basic ponytail.
These are just a few of the braid styles I’ve been playing around with. Honestly, YouTube is your best friend for learning new techniques. Just search for “[braid style] tutorial” and you’ll find tons of videos. Don’t be afraid to experiment and have fun with it! Even if it doesn’t come out perfect the first time, who cares? It’s just hair!
It’s not about aiming for perfection with these easy braid styles, it’s about having some fun. I definitely recommend giving these a try.