
Alright guys, today I tackled making some cheap but kinda cool party snack boxes outta cardboard. Saw this idea floating around and thought, “Why not? Let’s actually do it.” Spoiler: It worked… eventually! Here’s exactly how it went down.
Gathering My Random Supplies
First up, scavenger hunt time. Didn’t wanna spend much cash on this experiment.
- Cardboard: Raided the recycle bin – found an old Amazon box and some cereal boxes. Perfect victim material.
- Scissors & Box Cutter: My trusty fabric scissors (hope the wife doesn’t notice!) and a cheap craft knife I found in a drawer.
- Ruler & Pencil: Kid’s school ruler? Close enough. Any pencil with a point worked.
- Glue Gun: My hero! That sticky, stringy mess is perfect for cardboard chaos.
- Decorations: Leftover wrapping paper from last Christmas? Check. Some markers and paint? Why not.
Had everything kinda scattered on the kitchen table. Let the DIY chaos begin!
Planning? What Planning?
Okay, maybe I should have measured first. Jumped right in like an eager beaver. Grabbed the big Amazon box. Figured I’d make bigger trays from it. Used the pencil and ruler to sketch some simple rectangles – aiming for maybe 5 inches by 8 inches for the base. Easy peasy? Nope.
First Mistake: Forgot cardboard has flaps and creases! Tried cutting one piece out smoothly. Corners were wonky, edges ragged like a shark bite. Ugly. Had to re-scribble and cut more carefully. Lesson one: Avoid existing seams where possible.
The Measuring Dance (That I Hate)
Alright, now I started measuring properly… kinda. For the walls of each box:

- Cut strips about 1.5 inches tall from the main box for the big tray sides.
- Measured the long and short sides of the base rectangle.
- Cut two strips for the long sides, two for the short sides. Sounds simple. Nope. Cut the long ones a bit too long first time. Had to eyeball trimming them down.
Seriously, measuring cardboard is fiddly! Cereal boxes were even trickier – thinner, flimsier. Had to be super careful not to bend them while cutting.
Gluing: Where Sticky Fingers Were Made
Time for the glue gun. Plugged it in, waited for it to ooze. Smell of warm plastic filled the air.
Assembly: Took a long side piece. Squiggled a line of hot glue along its bottom edge. Quickly pressed it onto one long edge of the base rectangle. Held it for like 20 seconds. Did the same for the opposite long side. Okay, looking like something!
Problem: Then tried the short ends. Getting the angles right was the worst! Corners were not wanting to be neat and tidy. More like jagged and messy. Had to pile on extra glue blobs at the corners to “weld” them together. Burned my thumb. Ouch. Typical.
Repeated this whole sticky, frustrating, glue-string-covered process for the cereal box trays. Smaller = fiddlier. Lots of muttering under my breath.
Making Them Not Look Like Garbage
After the glue cooled (and I washed the glue off my thumb!), I had a bunch of very rough-looking, plain cardboard boxes. Needed a glow-up!
- Wrapping Paper: Tried covering the big tray first. Cut a piece bigger than the tray. Smothered the tray base and sides in glue stick. Slapped the paper on. Pulled it tight. Worked… okay. Edges were messy. Folded them over the lip? Failed. Ended up trimming haphazardly with scissors. Looks “rustic”.
- Markers & Paint: Easier! Drew some simple patterns on some smaller cereal box trays – polka dots, stripes. Covered one tray in leftover blue paint. Looks… well, like a kid painted a cardboard box. But color is color!
- Tissue Paper: Crumpled up some white tissue paper and lined a couple of trays. Instantly looked fancier! Why didn’t I think of that sooner?
Honestly, just adding anything made a huge difference.
The “Amazing Setup”? It Works!
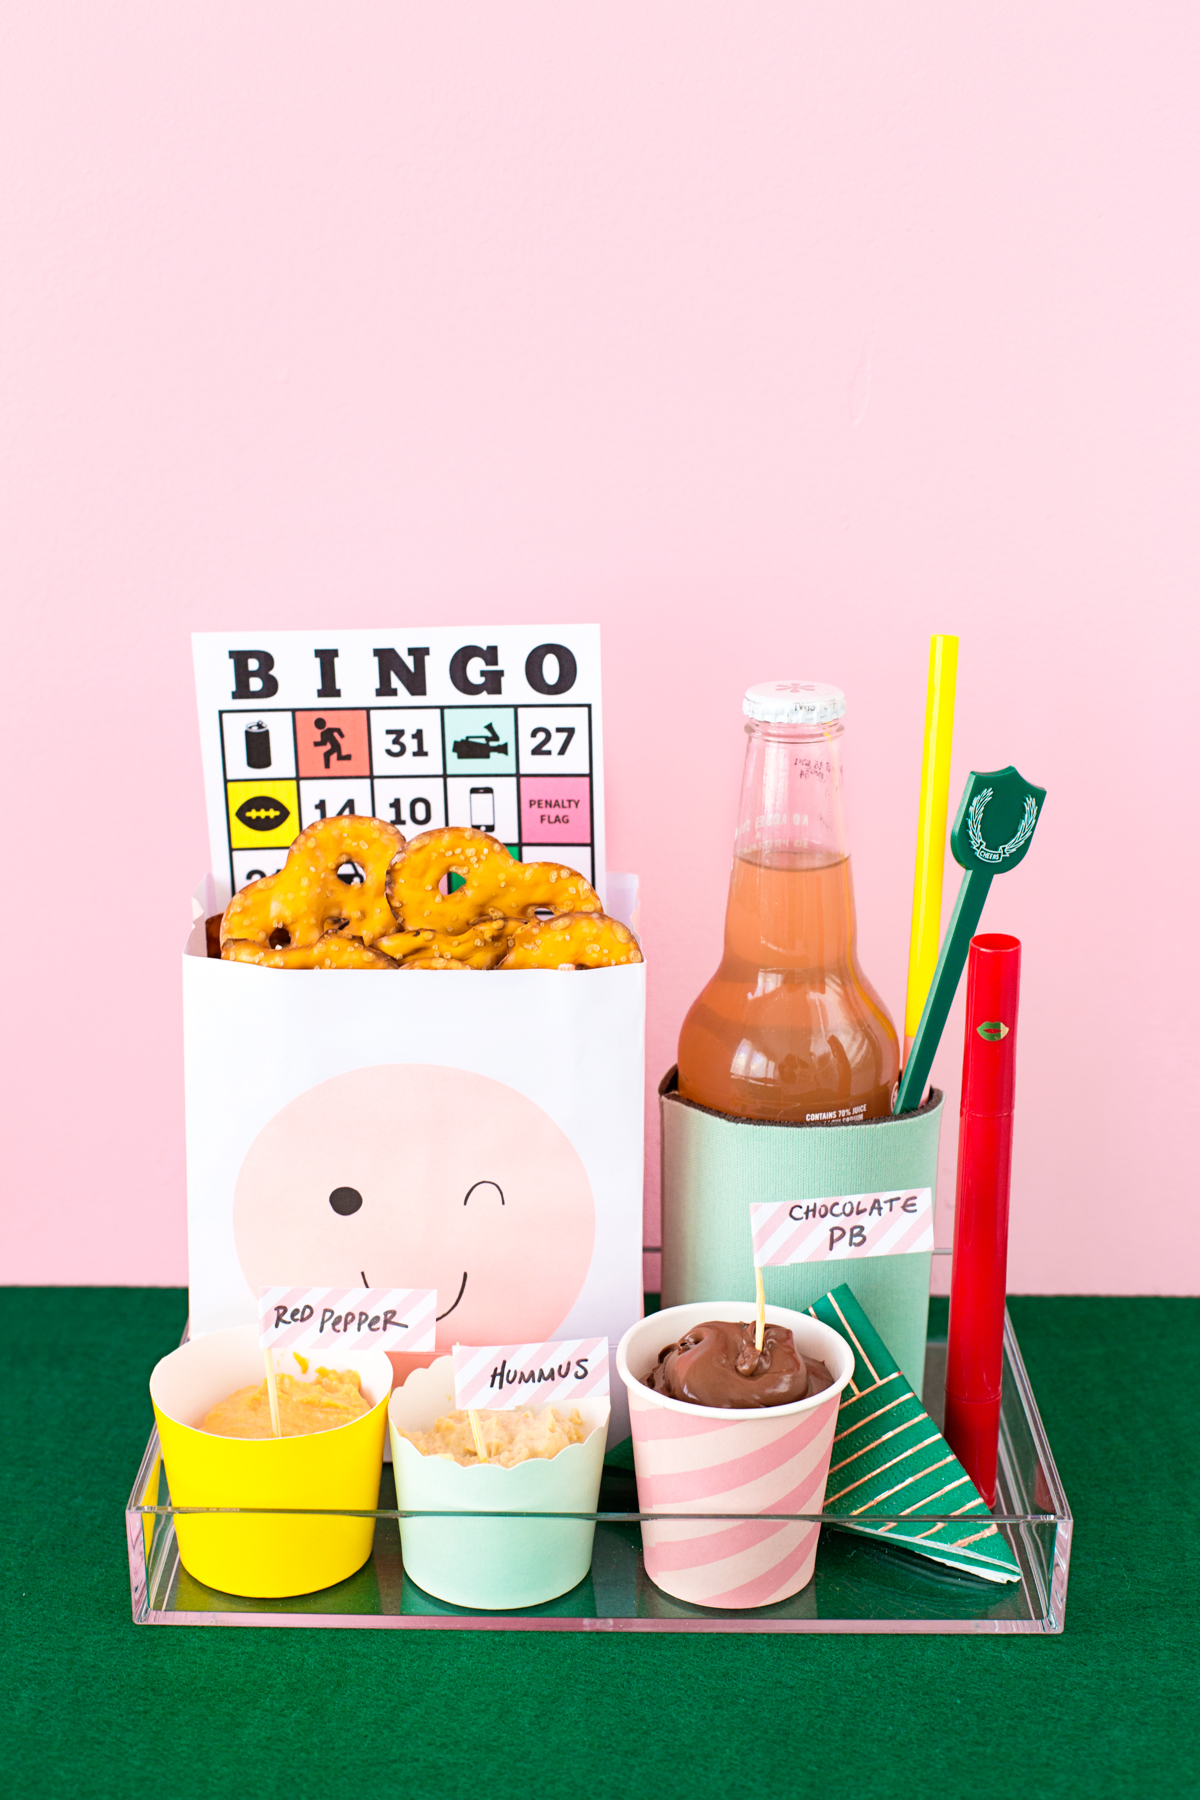
Finally took my weird collection of cardboard creations to the dining table. Placed some pretzels in one, cookies in another, cut-up fruit in another. Put them all together on the table.
Verdict? Not gonna win design awards, folks. But you know what? For holding party snacks? They actually function! They’re sturdy enough to pass around. My wife even said, “Hey, those look kinda fun… in a craft-project-gone-wrong way.” High praise!
Why share the messy details? Because doing stuff yourself rarely goes smoothly! I learned: Measure twice (maybe even thrice), go slow with the cutter, embrace the glue-gun burns, and sometimes wrapping paper hides a multitude of sins. Cheap? Totally. Useful? Surprisingly yes. Fun? After the initial frustrations, yeah. Give it a shot! Just watch your thumbs.
