
You know, some days you just get that itch, that craving for something specific. This past weekend, it was dim sum momos. I’ve bought my share of the frozen kind from the store, and let me tell you, they just don’t hit the same. So, I decided, right, I’m making these from scratch. It’s always a bit of an undertaking, but the payoff is usually worth the mess in the kitchen.
Making the Dough – The Real Start
First things first, the dough. It sounds basic, and it is, mostly flour and water. But getting the texture right? That’s where the game is. I remember my early attempts; one batch was like glue, the next could have been used as a paperweight. Experience, eh? That’s what it boils down to.
- I grabbed about two cups of all-purpose flour.
- Warm water, maybe three-quarters of a cup, give or take. You gotta add it slow.
I just chucked the flour into a big bowl, made a little well in the middle, and started dribbling in the warm water, mixing it with my hand until it started coming together. You want it pliable, not sticky, not dry. Then, onto a lightly floured counter for a bit of kneading. Maybe 5, sometimes 10 minutes if I’m feeling energetic, until it’s smooth. Threw it back in the bowl, covered it with a damp cloth, and let it sit for a good half hour. That resting part is crucial; don’t skip it. The dough needs to relax, makes it easier to work with later.
The Filling Saga
While the dough was having its siesta, I tackled the filling. I was in a chicken mood, so ground chicken it was. Finely minced, of course. Then came the chopping: onions, a good knob of ginger, few cloves of garlic, and some green onions. Chopped them all up as fine as I could. Nobody likes biting into a big chunk of raw onion in a delicate momo, right? I learned that the hard way a long time ago.
To the chicken and veggies, I added a splash of soy sauce, a little sesame oil for that nutty aroma, a pinch of white pepper, and a tiny bit of salt. Mixed it all together, but not too aggressively. You want to keep it somewhat light. I’ve seen people add all sorts of things, but I find simple is often best for these. The quality of the few ingredients really shines through then.
Folding Fun (or Frustration!)
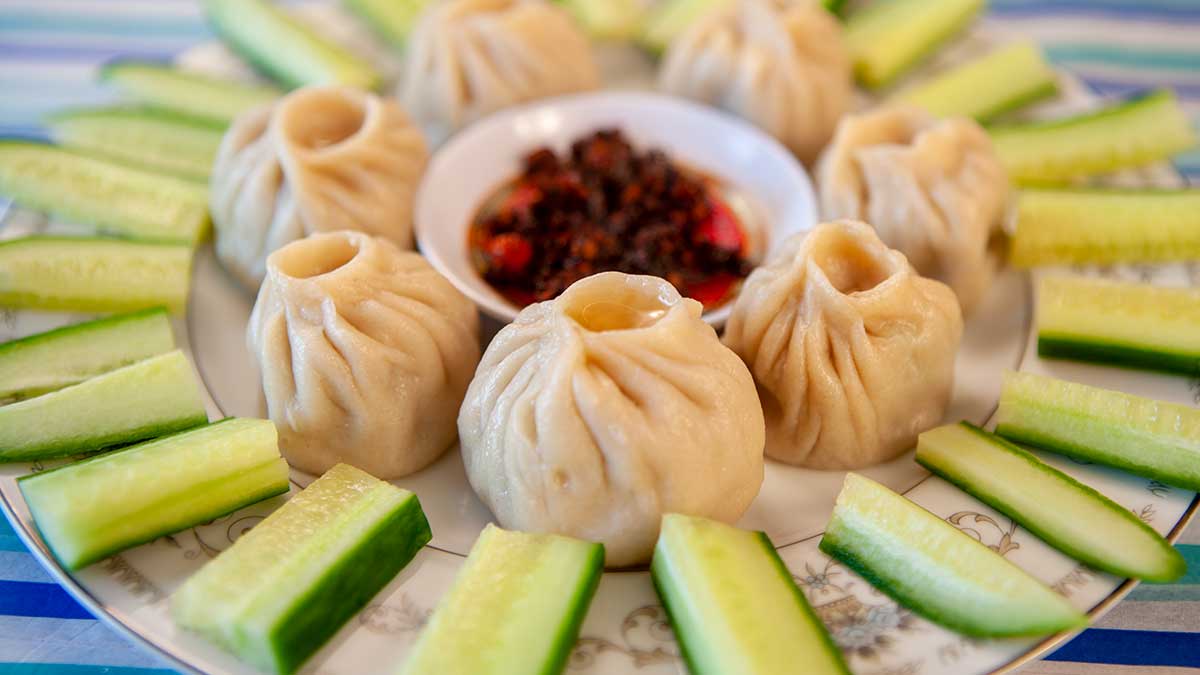
Okay, dough’s rested, filling’s ready. Deep breath. Time for the assembly. This is where patience really comes in handy. I punched down the dough, rolled it into a log, and cut off small pieces. Rolled each piece into a small, thin circle. Thinner at the edges, a bit thicker in the middle to hold the filling. My first few always look a bit, well, “rustic.” Let’s be kind. I aim for those pretty little pleats, but sometimes they end up looking more like lumpy money bags. As long as they’re sealed tight, that’s what matters to me. It’s not a beauty pageant, though I do admire those perfectly folded ones you see in restaurants.

Steaming to Perfection
Once I had a tray full of my uniquely shaped momos, it was time for the steamer. I usually line my steamer basket with some cabbage leaves or perforated parchment paper. Stops them from sticking, which is a real pain to deal with. Arranged the momos in a single layer, making sure they weren’t touching too much – they swell up a bit. Got the water in the pot boiling, then popped the steamer on top, lid on tight. Steamed them for about 10 to 12 minutes. You can sort of see them get a bit translucent when they’re done. The whole kitchen starts to smell amazing around this point.
The Grand Finale – Taste Test
And then, the moment we’d all been waiting for. Carefully lifted them out of the steamer. They were plump, glistening, and smelled absolutely divine. Served them up straight away with a dipping sauce I whipped up – just some soy sauce, rice vinegar, a bit of chili garlic sauce, and a tiny drizzle of sesame oil. Pure heaven. The wrappers were tender, the filling was juicy and packed with flavor. Every bite was a reminder of why I go through the effort. My family descended on them like a pack of wolves, so I guess that’s the best review you can get. Not a single one left.
So, that was my little dim sum momo project. A bit of work, a few moments of “why am I doing this?”, but ultimately, so satisfying. If you’ve been thinking of giving it a shot, I say do it. Don’t get hung up on making them look perfect. Just enjoy the process, and more importantly, enjoy eating your homemade creations. It’s a good way to spend an afternoon.