
Okay, so I’ve been on this gluten-free sourdough kick for a while now, and let me tell you, sandwich bread has been my Everest. Most GF sourdoughs are amazing, but getting that soft, sliceable sandwich loaf? Tough stuff. But, I think I finally cracked it, or at least got pretty darn close, and wanted to share how it went down.

My Starter Journey First
So, first things first, you gotta have a gluten-free sourdough starter that’s, you know, actually alive and kicking. Mine’s a bit of a diva, I feed it brown rice flour and some buckwheat, and it seems happy enough. For this bread, I made sure it was super active. Fed it the night before, then again in the morning. Waited till it was all bubbly and nearly doubled. That’s key, I reckon. If your starter’s sleepy, your bread’s gonna be sleepy, and nobody wants that.
Getting The Dough Together
Alright, so with the starter ready, I started mixing things up. I grabbed my go-to gluten-free flour blend – it’s mostly brown rice flour, tapioca starch, and potato starch. I’ve messed around with a bunch, but this one seems to work best for me for breads.
Then, the tricky bit for gluten-free: the binder. I used psyllium husk. Whole husks, not the powder. I mixed that with some water and let it get all gloopy. This stuff basically pretends to be gluten. It’s weird, but it works.
Into the big bowl went the flours, some salt, a little bit of sugar (just a touch, for flavor and to help the yeast), the psyllium gel, and my bubbly starter. Oh, and water, of course. I added the water slowly. Gluten-free doughs are thirsty, but you don’t want soup. I aimed for a very wet, shaggy dough. It’s not like wheat dough at all; you can’t really knead it in the traditional sense. I just mixed it really well with a spatula until everything was combined. It looked a bit like thick porridge, honestly.
The Waiting Game – Bulk Ferment
Then came the waiting. This is where patience really pays off. I covered the bowl and just let it sit on the counter for, like, 6 hours. My kitchen’s not super warm, so it takes a while. I did a couple of “stretch and folds” during this time, which for GF dough means wetting your hands and kind of scooping and folding the dough over itself in the bowl. It helps build a bit of structure, or so I’ve read. The dough definitely started to look a bit more cohesive and airy after a few of these.
Shaping (or trying to!) and Proofing
After the long wait, the dough was looking puffier. Time to shape! This is always messy. I floured my counter (with GF flour, obviously) and gently tipped the dough out. It was still super sticky. I tried my best to gently shape it into a sort of log to fit into my loaf pan. I lined my pan with parchment paper – makes getting it out way easier. Plopped the dough in, smoothed the top a bit with a wet spatula.
Then, more waiting. The final proof. I covered the pan and let it sit for another couple of hours. I was watching it like a hawk. You want it to get noticeably puffier, but if you over-proof it, it can collapse. It’s a fine line!
Baking Time!
Finally, baking time! I preheated my oven super hot, like 450°F (around 230°C), with a Dutch oven inside. I find baking GF sourdough in a Dutch oven gives the best crust and rise because of the steam.
Carefully, I transferred the loaf (still in its parchment sling) into the hot Dutch oven, put the lid on, and baked it for about 30 minutes. Then I took the lid off, turned the oven down to about 400°F (200°C), and baked it for another 25-30 minutes until it was nice and golden brown and sounded hollow when I tapped the bottom. The smell in the kitchen was just amazing.
The Big Reveal and Taste Test
This is the hardest part: waiting for it to cool. You absolutely HAVE to let it cool completely before slicing, or it’ll be gummy inside. Torture, I know. I left it on a wire rack for, like, 3 hours at least.

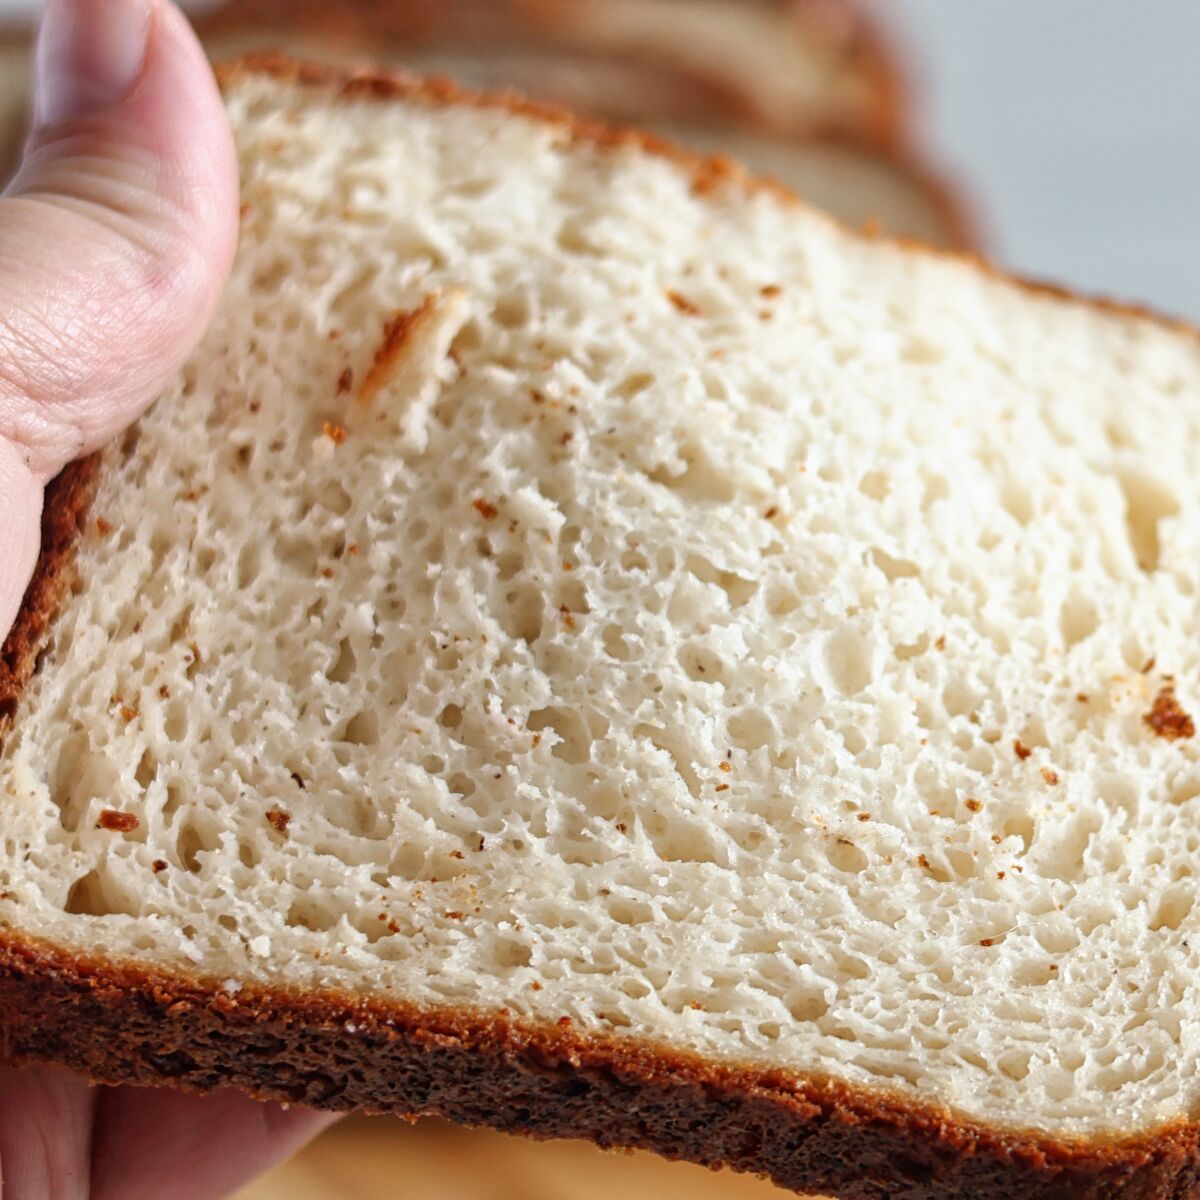
And the result? Success! It was soft, had a decent crumb (for GF, you know, it’s never gonna be like wheat bread), and it actually tasted like sourdough! It made fantastic sandwiches. The crust was a little chewy, the inside was moist. I was so chuffed.
- What I learned: Patience is everything. Don’t rush the fermentation.
- What I might do next time: Maybe add some seeds for extra texture. Or play around with a bit of sorghum flour in the blend.
So yeah, that was my adventure in making gluten-free sourdough sandwich bread. It took a few tries to get here, but this loaf was definitely a winner. If you’re on the GF sourdough journey, keep at it! It’s worth it.