Okay, so I had this sudden craving for something sweet the other day, you know how it is. And I remembered seeing a “quick and easy marshmallow recipe” somewhere, and I thought, “Hey, I’ve got most of that stuff lying around!” It felt like one of those moments where you just gotta try something new, or at least something you haven’t made in ages.

First things first, I went on a bit of a scavenger hunt in my kitchen. Seriously, finding everything was an adventure in itself. I needed sugar, of course, and some light corn syrup. Then the star of the show: unflavored gelatin. Had a couple of those little packets. And vanilla extract, a must for good flavor. Oh, and water, can’t forget water. I also grabbed a square baking pan, some cooking spray, and a good ol’ whisk attachment for my stand mixer, which, let me tell you, is a lifesaver for this kind of thing.
Getting Started with the Sticky Stuff
So, I kicked things off by “blooming” the gelatin. Sounds fancy, but it just means I sprinkled the gelatin powder over about half a cup of cold water in the bowl of my stand mixer. I just let it sit there to get all soft and jelly-like. Gave it a little stir to make sure all the gelatin got wet.
While that was doing its thing, I moved over to the stove. In a medium saucepan, I combined the sugar – about a cup and a half, I think – the corn syrup (maybe a cup of that?), a pinch of salt, and another half cup of water. I gave it a stir just to get it all friendly with each other before turning on the heat. I brought that mixture to a boil, stirring it occasionally at first. Once it was boiling, I stopped stirring and just let it cook. The recipe said to get it to a specific temperature, around 240°F (or 115°C). I clipped my candy thermometer to the side of the pan. This part is kinda crucial, you don’t want to mess up the sugar temperature, or things can go sideways.
Whipping it Good
Once the sugar syrup hit that magic number on the thermometer, I took it off the heat. Back at the mixer, I turned it on low with the whisk attachment, just to get the bloomed gelatin moving a bit. Then, ever so slowly, I started pouring the hot sugar syrup in a thin stream down the side of the bowl. You gotta be careful here; that syrup is super hot, and you don’t want it splashing on you. Learned that lesson the hard way making caramel once. Ouch.
After all the syrup was in, I cranked up the mixer speed to high. And then, you just let it whip. And whip. And whip. It’s pretty cool to watch, actually. The mixture starts out kinda yellowish and thin, but as it whips, it gets super white, thick, and glossy. It grows a lot in volume too! This took a good 10 to 12 minutes, maybe even 15. You’re looking for it to get really fluffy and hold its shape, kinda like thick meringue or, well, marshmallow creme!
Towards the end of the whipping, when it was looking all voluminous and amazing, I poured in about a teaspoon of vanilla extract. Let it whip for another minute just to mix that in properly.
The Pour and the Patient Wait
Okay, so while the mixture was whipping, I had prepared my baking pan. I used an 8×8 inch square pan. I lightly greased it with cooking spray, then dusted it really well with a mixture of powdered sugar and cornstarch (about 50/50). Don’t skimp on the dusting! This is what stops the marshmallows from sticking to everything and becoming an impossible goo.
Once the marshmallow mixture was ready – super thick and fluffy – I poured it into the prepared pan. It’s incredibly sticky stuff, so I used a spatula that I’d also lightly greased to help spread it out as evenly as I could. It wasn’t perfectly smooth, but homemade charm, right?
And then came the hardest part: waiting. I dusted the top of the marshmallow mixture in the pan with a bit more of that powdered sugar/cornstarch mix. Then I covered the pan loosely with some plastic wrap and just left it on the counter to set. The recipe said at least 4 hours, or even better, overnight. I think I managed about 5 hours before I couldn’t stand it anymore.
Cutting and Enjoying the Fluff
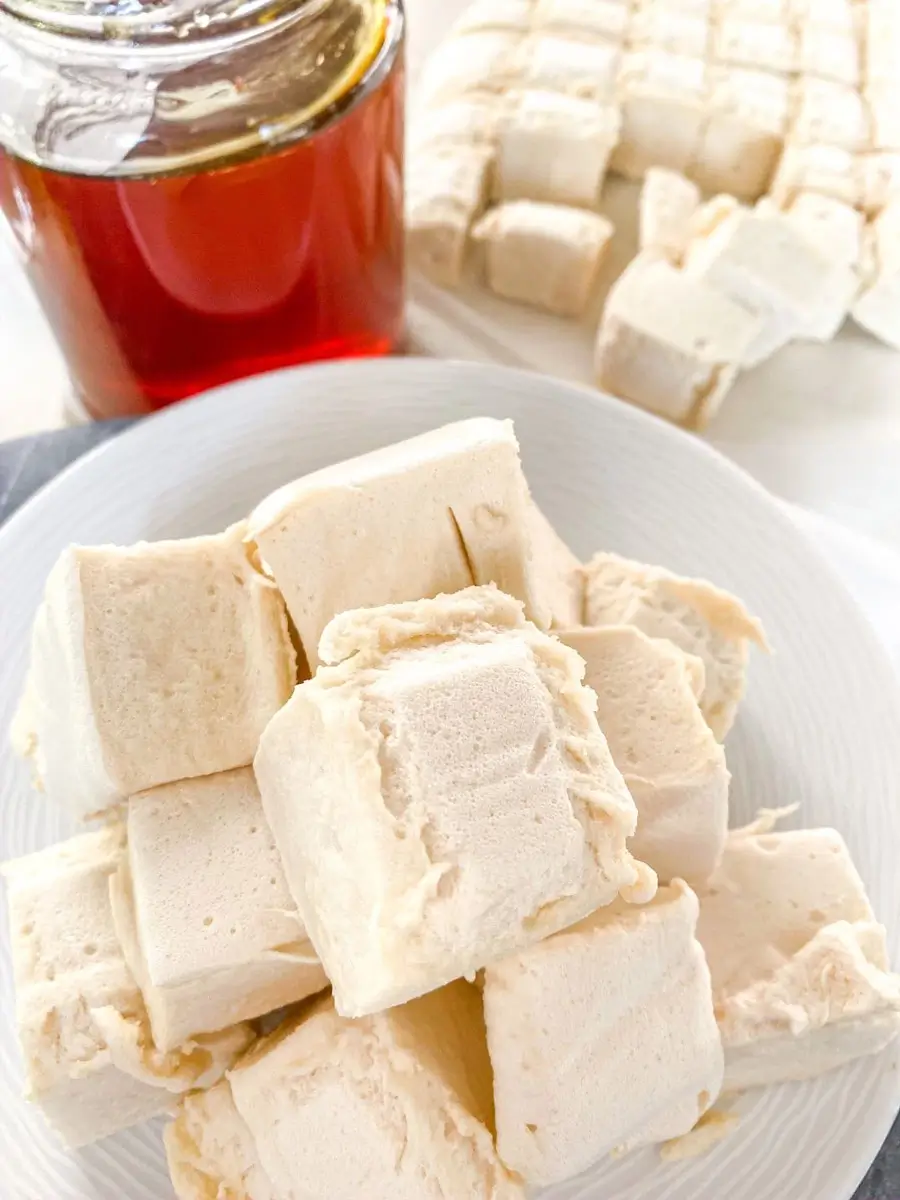
After the long wait, the marshmallow slab felt firm to the touch. I generously dusted my cutting board with more of the powdered sugar/cornstarch mixture. Then I carefully loosened the edges of the marshmallow from the pan and flipped the whole thing out onto the dusted board. It came out pretty cleanly, thanks to all that earlier dusting!

I used a large knife, also dusted with the powdered sugar mix (see a theme here?), to cut the slab into squares. Some people use a pizza cutter, which is probably a smart idea. As I cut each piece, I tossed it in a bowl with more of the dusting mixture to coat all the sticky sides. This stops them from clumping together into one giant marshmallow monster.
And that was it! Homemade marshmallows. They were so much better than the store-bought ones. Super soft, fluffy, with a nice vanilla flavor. They weren’t perfectly uniform squares, but who cares? They tasted amazing. Definitely a fun little project. “Quick”? Well, the hands-on time isn’t too bad. “Easy”? Yeah, I’d say so, as long as you have a stand mixer and a candy thermometer. The cleanup was a bit sticky, not gonna lie, but totally worth it for those pillowy clouds of sweetness. I’ve already eaten half of them!